Wednesday, April 14, 2010

First Furniture Transformation

TADA!

This project has taken me way longer than I would have ever dreamed. I hear others in blog land talk of doing projects in a weekend....what is up with that. Maybe some day I can be more efficient.

I bought this gun cabinet from a lady on Craigslist. Her dog tried to bite me but it was so worth it.

Are ya just itchin to see it? Ok I will stop teasing. Her she is in all her faded glory.

She is a little rough around the edges. I am sure she had seen better days.

I took her apart to make the sanding and spray painting a little easier. Time for sanding.....

I sanded the whole thing down and filled in deep scratches and chips with wood filler......I kinda missed some picture taking opportunities here. I added crown molding to the top. After sanding I primed everything and then decided to add two slots for baskets.


I remembered to take the most random pictures. This is the basket box that I was building.

Just a little peep


The drawer pull and knob were both ORB and did not show well so I gave them a spattering of silver and now they pop and match the chicken wire!


Oh...I know....GET ON WITH IT!


I junked the pressed stuff that was on the back and replaced it with bead board. I painted it white and then glazed it. There was no glass for the door so I stapled and stapled and stapled....oh sorry....chicken wire. Did I mention that it took a billion staples for the chicken wire and that I can attest to the fact that it will eat your knuckles off.


BEFORE
AFTER

Just a couple more angles cause I just cant stop!!!

This one helps you see the glazed bead board goodness!


Ain't she a beauty? Just as I envisioned her to be!!
Would you have done something different? Let me have it.

Update: I just have to say that the best part of this project has been the end. Let me explain....Every person that has come into our home has been escorted by my husband to see the cabinet. I think he is a tad proud. Makes my heart go pitter patter!

Linking to:


Get your craft on Thurs.


Beyond The Picket Fence 
giveaways

Furniture Feature Fridays
UndertheTableandDreaming 
The DIY Show Off

Show and Tell Green


 http://linda-coastalcharm.blogspot.com/

Sunday, April 11, 2010

No It's Not Cutwork Silly.....It's Spray Paint!

This is another project that my friend and I did for her daughters apartment. I know.....I wish I would have had someone to do this kind of stuff for me when I was young and on my own. I got this idea from Frugal Home Ideas

I have seen many different versions in blog land.
Here is my version. I just wanted to add a lil sumpin sumpin! You know girls...you always want to put your stamp on it. So here she is all curly and purrrrty.


I did not get photos of the process as we made it but will be making another one.
I may use it as a headboard. I will do a tutorial then or you can check out the tutorial at Frugal Home Ideas. I was asked by a girl that saw it if it was cutwork?
Spray paint baby!

If you didn't notice what the difference is .....I layered mine...well overlapped the middle one on top of the 2 outer ones. Went to Lowe's and got some cute screws and washers.

Don't you think this would make a great headboard???????

Party Links
Making
 
The Girl Creative
Sumo Sweet Stuff
Keeping It Simple 
The DIY Show Off
Get your craft on Thurs.


Show and Tell Green
UndertheTableandDreaming

Thursday, April 8, 2010

One Journey DONE!

Today was the close of one journey in mine and my husband's life. I was hit on my motorcycle (HD Street Glide) 2 years ago. That is the event that changed the path of our lives. A simpler cheaper life. You have to look for the good in everything. I am now able to stay home and craft and be the doting housewife that I always dream of being as a little girl.

I did not replace my bike after the wreck as I had a long recovery. My husband continued to ride, but not often like we used to. Well today we sold my husband's Road Glide. No more riding. Stop jumping up and down Mom......I know you are thrilled.  I took it around the block last night for the first time since my wreck and remembered the joy that I used to get from riding.

I am finding new ways to get that same thrill...high....excitement! Rehabbing others cast offs. I am hoping to start and Etsy site soon........Time to start a new journey!

Wednesday, April 7, 2010

Candle Sconce Makeover

I have to start out with telling you that I get too eager and forget things.....like taking pictures and not realizing that there is no flash card in the camera. Having said that....I do not have good before pictures. Just imagine 1980's glazed terracotta color with a brass candle holder thingy.

I got this shabby old thing at, you got it, Goodwill! No surprise there. It is cast metal with a brass candle holder. I must start taking pictures of my treasures when I first get home because once the vision hits there is no turning back. So here is as close to before as I could get.


As you can see I primed it and the gave it a spray of RED....squeal

Next I used black paint mixed with a little water and just brused it all over. Then used a damp microfiber cloth to remove most of the black paint.

Not enough.......One more coat of black and wipe....

Now that is the goodness that I am lookin for!
Ooops...forgot about the candle base...

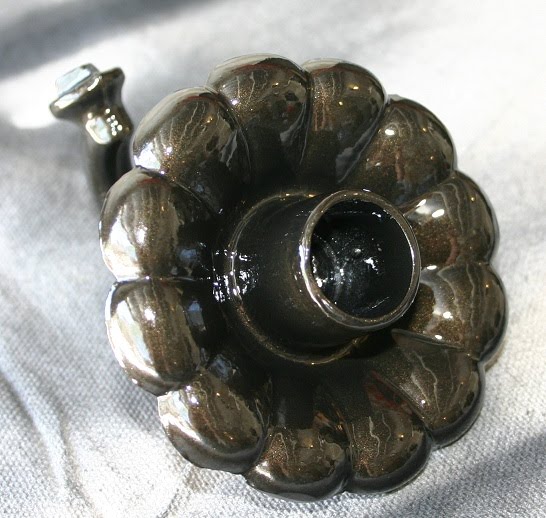
Love me some ORB goodness but held it up to the sconce and it was not working....next

Flat Black...now that is right on time!
Let's put this baby together....


Better view of the color.

Pieces with mirror are my nemesis. I can't get a good shot of them. Any tips?

Linking up with:


Get your craft on Thurs.